In this article, we’ll guide you using the View Results tools within the Basic View. This view offers a straightforward, user-friendly layout highlighting details like price, ROI, and key opportunities.
If you prefer a more advanced layout, check out our View Results Tools: Advanced article to explore the Advanced View option.
These instructions apply to the following search portals, helping you make the most of the tools available in each:
- Product Search (basic)
- Reverse Search (basic)
- Wholesale Search (basic)
Amazon Flips and the Library Search feature is not included in this list because they do not have a Basic View.
The View Results page in Basic View is a much easier to navigate compared to the table in Advanced View.
That said, getting your head around the tool set can be a challenge for newbies. That's why we divided the instructions into smaller articles. To understand key functionality on the View Results page, you should also read:
Opening the View Results page
There are several ways to open the View View Results page:
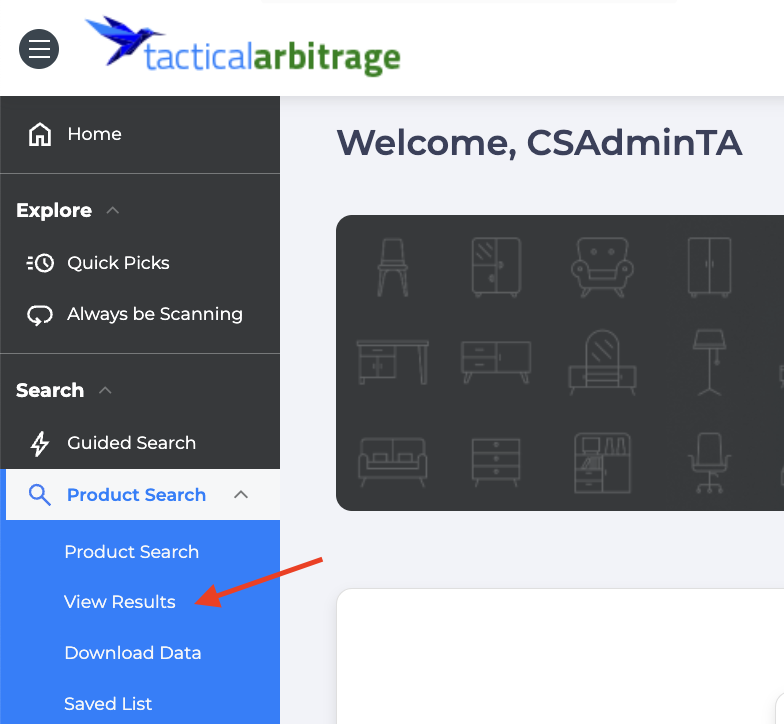
- On the main dashboard, click View Results on the black menu on the left side of the screen. A drop-down menu displays and select View. The View Results page for Product Search displays.
- Inside a search portal, click the blue View Results button.
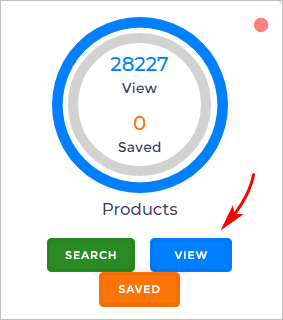
- On the main dashboard page (only available on the Old UI), click the View button on a search portal. The range of portals on your dashboard depends on your subscription service.
Choosing the Basic View Mode
- Go to the View Results page of a search portal.
- Scroll up to the top of the page.
- If not already selected, toggle the switch towards Basic.
Selecting a Search
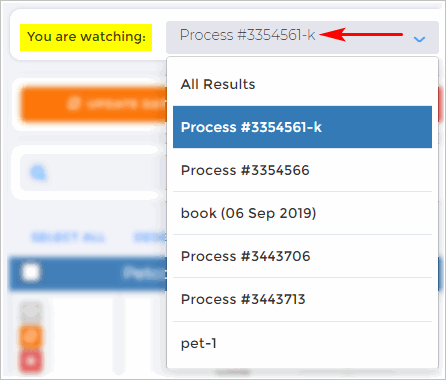
You can either look at all the data discovered to date, or if you have run more than one search, select a search you've run for a more granular approach.
- Click the field beside You are watching. A drop-down menu displays.
- Select a search on the menu. The search results display on the page for you to select from.
1. Viewing Process Details
After selecting a saved search, a green Info button displays on the menu bar.
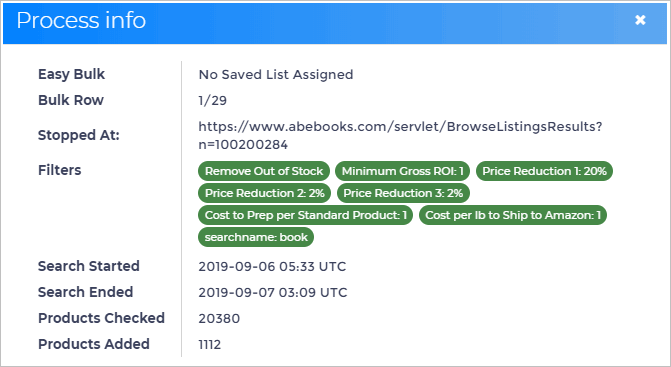
- Click the Info button. A Process info panel displays.
- Clickthe X to close the panel.
The panel has information about the search, including the URL, search date, and number of products added.
2. Changing the Search Name
You have the option to change the name of your Saved Search by:
- Click the blue pencil
- Edit the search name
- Click the check mark to save the name change.
- Click the X to cancel the change.
Reverse Search Button
After selecting a saved search, you’ll see a blue Reverse Search button on the menu bar (note: this tool isn’t available on the Reverse portal). By selecting this option, a new Reverse Product Search tab will open in your browser, pre-loaded with all ASINs from the current View Results data, allowing you to quickly initiate a Reverse Search on these items.
For more information about Reverse Search, check out Reverse Search: Basic View and Reverse Search: Advanced View article.
Adding Notes
After selecting a saved search, a Notes button displays on the menu bar. This handy tool lets you jot down notes as you work through the data analysis.
To add a note:
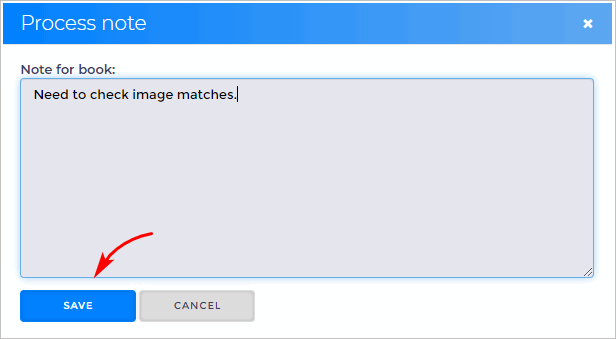
- Click the Notes button. A panel displays.
- Write a note and then click Save.
- The pencil will go green indicating a note is saved here for viewing.
Show Barcodes
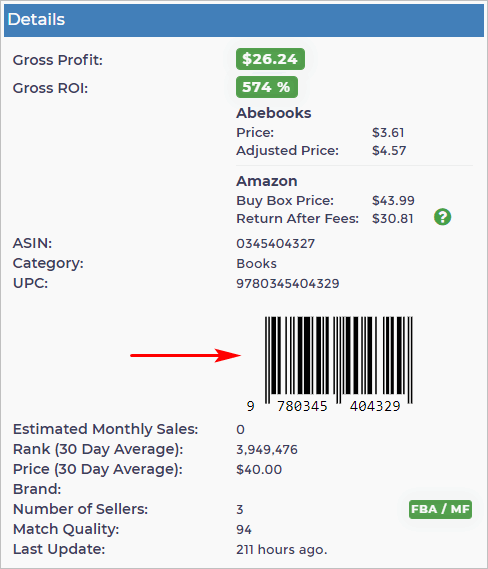
This switch controls the display of barcode images in the table.
- Toggle ON the switch to display barcode images for the products in the table.
- Toggle OFF the switch to hide the barcodes.
Updating Data
Use this tool to refresh the information in your table. This button updates data for all products displayed. You can update the data by:
- Scroll up to the top of the View Results page.
- Click the orange Update Data button. A drop-down menu displays.
The drop-down menu has four options:
- Update Source Prices
- Update Adjusted Prices
- Update Amazon Data
- Update All Data
On the Wholesale Search page, only two options are available: Update Adjusted Prices and Update Amazon Data.
To learn more about each option, read the Updating Data in View Results Page article.
Download All Button
Use this tool to download your search results.
For more details on using the Download All button, check out our article: Download, Delete, and Save Data on the View Results Page.
Delete All Button
The Delete All tool may look straightforward, but it offers more than just clearing the entire table. At its core, clicking the Delete All button will erase all data in the table. When you select it, a confirmation panel appears. Click Delete All again to proceed.
After deleting a table, you can restore the data from the Recycle Bin (under the Analysis Tool) within 24 hours only.
Move All Botton
The Move All tool is especially useful for saving large tables of data. It allows you to transfer all information from a View Results table into a designated folder for easy access later.
To use it:
- Scroll to the top of the View Results page.
- Click the Move All button. A confirmation panel will appear.
When the Move/Copy All panel is open, you’ll see several options available. For a detailed guide, refer to the article Download, Delete, and Save Data on the View Results Page.
Using the Page Display Toolbar
This toolbar helps you navigate the table. It's very handy when there are hundreds or even thousands of search results.
Scroll up to the top of the View Results page. The toolbar shows several pieces of information.
1. Search Tool
Use this tool when you want to narrow the search results based on a keyword in the title. You can also use it to search a UPC, EAN, or ASIN.
- Enter a keyword (or product code) in the search field.
- Click the magnifying glass or hit Enter on the keyboard. Products with that key word (or product code) display in the table.
- To remove the search filter and display all results, delete the keyword from the search field and then click the magnifying glass (or hit Enter on the keyboard).
2. Current Page
The page currently on display in the table is highlighted in the toolbar. The current page is blue. Click a different number to change the table page.
3. Change Page
There are two ways to change the table page. You can click a number in the toolbar. Or, click the field next to Go and type a page number. Click Go and the table data changes.
4. Show Results
You can change the number of items on display in the table. Click the field next to Show and select a number on the menu. The maximum number is 100.
5. Number of Entries
On the right side of the toolbar, you can see the number of entries currently on display in the table. You also see the total number of entries for this search.
In the image above, the toolbar shows the total number of entries for this search is 25,926.
Looking at Exchange Rate
Scroll to the top of the View Results page and you'll see the words Exchange Rates.
Click the nearby question mark and a panel displays. It shows current exchange rates used when calculating prices and margins for cross-country transactions (e.g. if your search was for buying in the UK to sell in the US).
This panel on the View Results page is for information purposes. This data cannot be changed. It is only useful when you are doing cross-country transactions.
Sort & Filter Data Tool
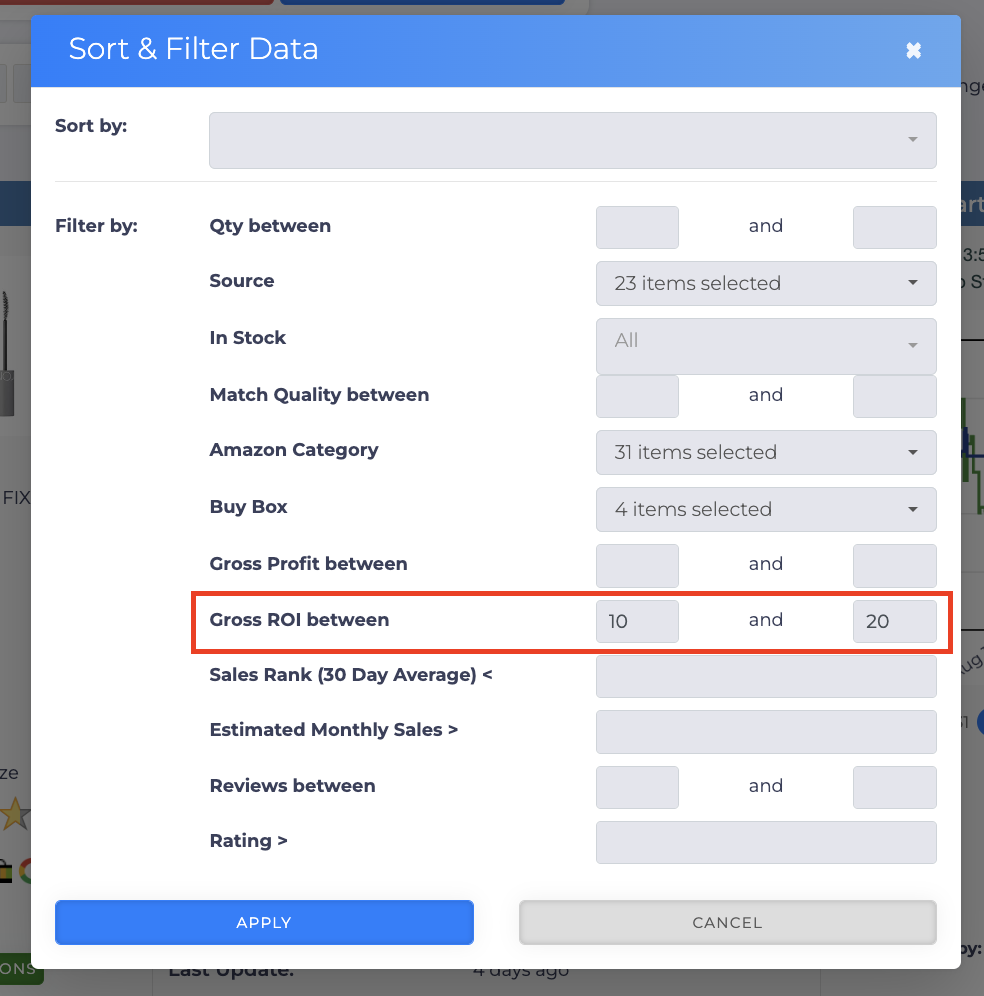
This button allows you to set filters after your scan has started or finished. We recommend setting filters as low as possible initially, as you can further refine them on the View Results page to find the results you want.

For example, if you want to see only products with an ROI between 10% and 20%, locate the Gross ROI filter, enter the values, and click Apply. This filter will then apply to your data.
What’s Next?
Explore the View Results: Basic article series to learn more about its functionality:
Prefer an advanced view? Check out the View Results Tools: Advanced article for detailed guidance.


