
If you’re new to Tactical Arbitrage, the Dashboard might initially seem a bit overwhelming. As the main page you land on after logging in, it serves as your central hub for everything you need.
In this article, we’ll walk you through the Dashboard step by step. By the end, you’ll be ready to dive into the more exciting features of Tactical Arbitrage with confidence!
We have also just launched a new UI for the Home or Dashboard page. You can control whether you want to use the old or new UI in the bottom right corner of your page. Also, visit this article if you want to learn about our new Home page!
1. Understanding the Side Menu Bar
The black bar on the left side of the Dashboard is your side menu, offering quick access to all the Tactical Arbitrage tools. Need to get back to the main page? Just click Home at the top—it’s that simple!
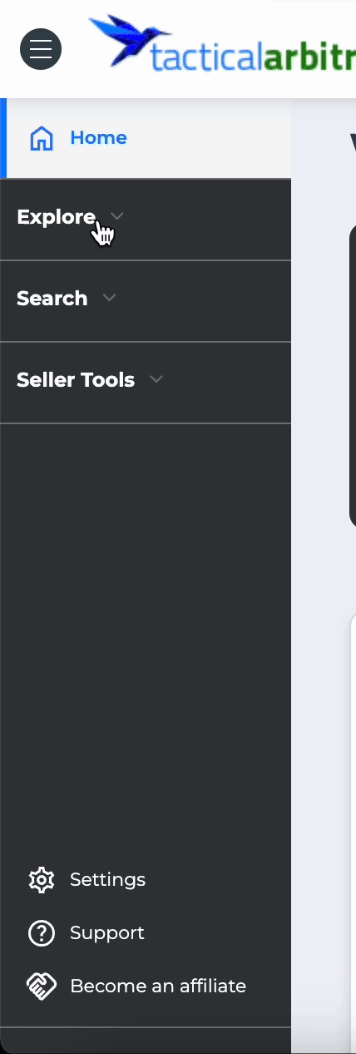
The sidebar is collapsible, so make sure to expand each section to discover more features.
2. Opening the Profile Panel
The Profile panel displays your name along with account and invoice information.
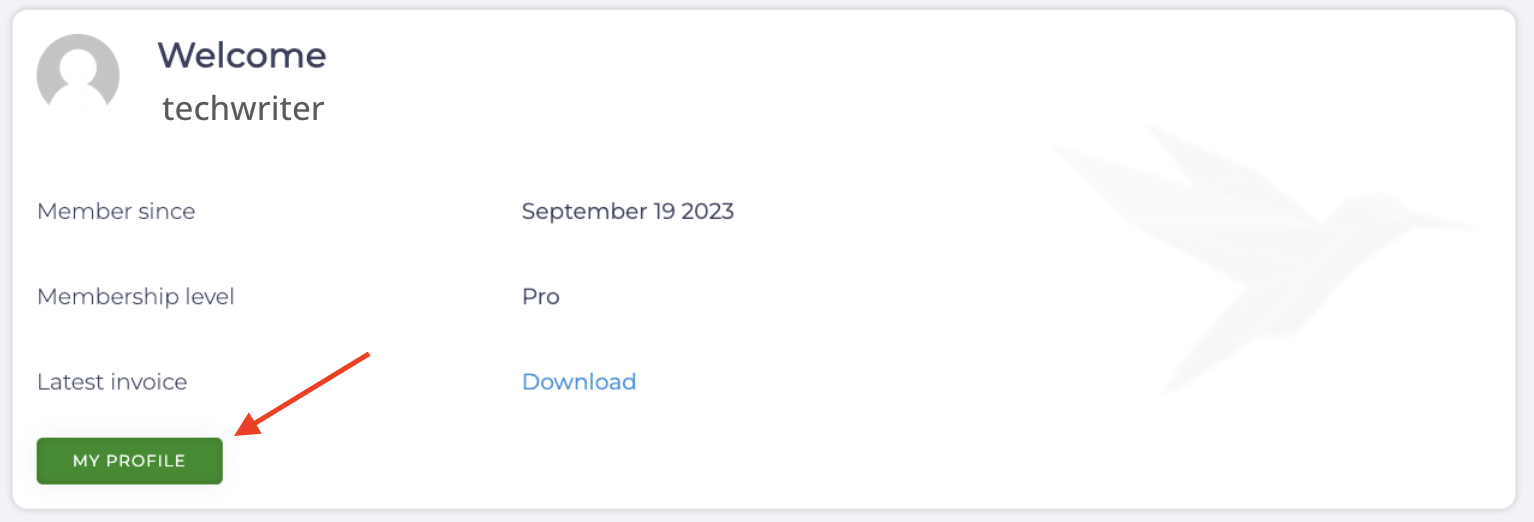
You can click My to personalize the profile display.
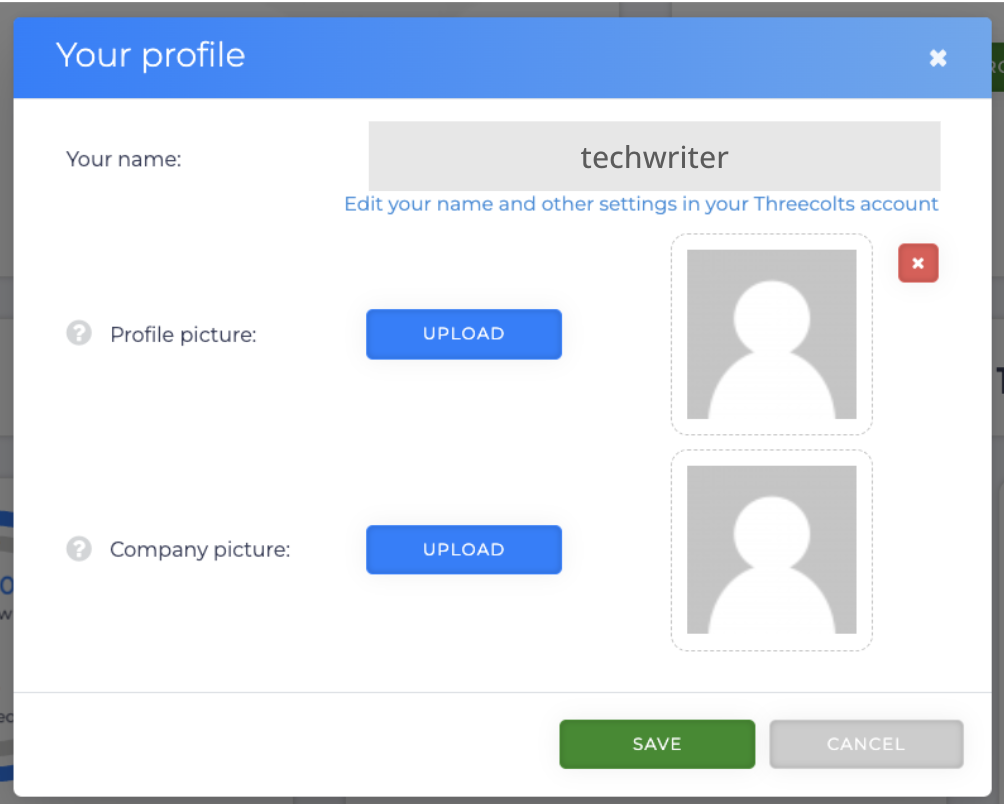
To personalize your profile:
- (Optional) Enter a new name.
- (Optional) Click Upload to add a profile picture or company logo from your computer.
- Ensure the width of the image is greater than the height. If not, an error message will appear.
- For profile pictures, the file should be less than 2MB and have a 1:1 aspect ratio (e.g., 52x52px).
- For company logos, there is no need for a 1:1 aspect ratio, but the file should also be under 2MB.
- Click Save to finish. The panel will close.
3. Reviewing the Search History
The Search History helps you track searches and search results. You can also look at search results using the View Results tool.

To get more information about Search History, visit this article!
4. Always Be Scanning Panel
Always Be Scanning is a feature in which Tactical Arbitrage will add in random products that are usually quite profitable. To find the ABS page, go to your sidebar and search for Always Be Scanning under the Explore section.
On this Home page, you can activate the feature by toggling the button.
Once activated, we will automatically add products that are quite profitable. You can visit the ABS page to get more details of products added.
5. Understanding the search panels
Depending on your subscription, one or more search panels appear in the middle of the page. They are boxes with double circles and three buttons. Search panels are the engines of your arbitrage business.
The image below shows all five search engines. These five panels are available to subscribers with the Full Suite tier or Pro plan.
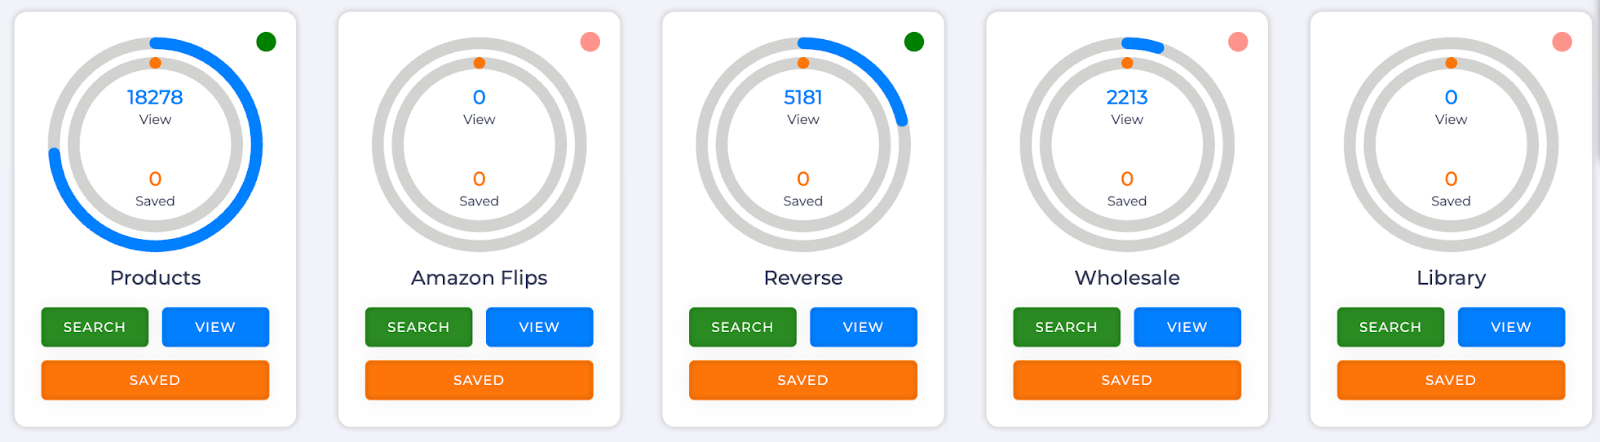
6. Reading Search Panel
Each search panel contains information and links.
- The green button in the top right corner indicates a search is currently in progress. The default is red, which means no searches are running.
- The outer circle graphically displays the number of products in your View Results page. The actual number is shown inside the circles just above View.
- The inner circle graphically displays the number of products on your Saved List. The actual number is shown inside the circles just above Saved.
The panel has three quick link buttons. Click a link and go to that page.
- Search: Go to the search page for that tool.
- View: Go to the View Results page and conduct your search results analysis.
- Saved: Go to the Saved List and inspect the items you've set aside for a future look.
7. Using ASIN Analysis Tools
The dashboard has two tools that let you scan Amazon for specific products and price points. These tools are Product Variations and Tactical Edge.

To use these tools, you’ll need an ASIN (Amazon Standard Identification Number). Amazon use ASIN to identify products on its platform.
What's Next?
Want to start your first scan in Product Search? Visit this page to learn more.