Ready to launch a fast Reverse Search but don't know how to start? This is a simple way to get started.
This article shows you how to source products on the Reverse Search portal using Basic View. By the end of this article, you will know how to:
- Input source resources
- Use filters in Basic View Reverse Search
- Launch a search and use the Search History
Activating Basic View
The Reverse Search page has two view states: Advanced and Basic.
This article explains how to use Basic View. You can visit this article to learn about Advanced View in Reverse Search.
To display Basic View on the Reverse Search page:
- Click Reverse Search on the side menu bar. The Reverse Search page displays.
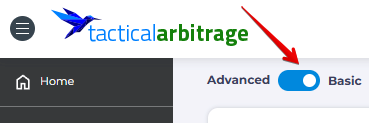
- In the top left corner, click the toggle towards Basic. Basic View will display on the page.
Selecting a Source Country
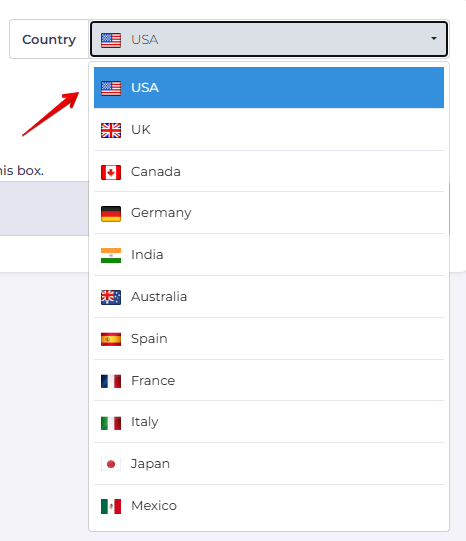
Choose a country to source products from. This tells the platform to focus on finding products from that specific region, which determines the websites that appear in the search results.
- Click the box beside Country. A drop-down menu displays.
- Select a country
Using Search Tools
To run a Reverse Search, you first have to enter a product list. Your two options:
- Manual Entry
- Scan Bestsellers
Each option is described below.
1. Manual Entry
You can enter search data manually. Enter up 100 UPCs and/or ASINs.
- Select Quick Search
- Enter a UPC or ASIN in the search field.
- For multiple entries, insert a comma between numbers.
2. Scan Bestsellers
You can also scan the Bestselling ASINS of Amazon product categories. This will search a list of the most popular Amazon products based on sales.
This search tool has several levels. If you select a product category on Level 1, the scan searches 100's of thousands of items.
If you want to narrow the search, select sub-categories in other levels. Once you go to Level 2 or beyond, the number of products searched is lower. Up to 9600 items in most cases.
To search Amazon's Best Sellers List:
- Select Scan Bestsellers
- Click the box beside Level 1. A drop-down menu displays.
- Select a general category.
- To narrow the search, go to the next level down
- Click the box and then select a sub-category on the menu
- Continue down the list to narrow the search, if desired.
- Leave Start from # if you want the search to start at the default row number one.
Selecting site discounts
After entering a list of product codes or selecting a product category, the next step is to set discount thresholds.
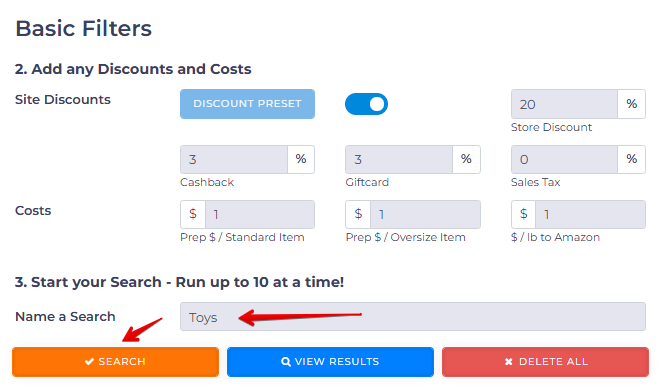
In Basic View, there are three discount filters.

Entering Cost Data
The next step is to enter cost data. Tactical Arbitrage uses these figures to estimate your profit per sale and gross return on investment (ROI).

- If you live in a jurisdiction that charges sales tax (or your business doesn't enjoy tax-exempt status), enter a figure in the Sales Tax data field.
- The Prep $/Standard Item field is the cost to send a standard product to the Amazon facility you work with. This cost includes prepping a product and shipping Standard Items to Amazon.
- The Prep $/Oversize Item field is the cost to send an oversize product to the Amazon facility you work with. This cost includes prepping a product and shipping Oversize Items to Amazon.
- The $/lb to Amazon field estimates shipping costs to Amazon based on weight. It's a difficult number to capture accurately for new users. With experience, you develop a keen sense of this cost for your product range.
Running a search
The final step is to name the search and then start a search.
- Click the field beside Name a Search and enter a unique title.
- Click the Search button.
You can run up to ten searches of any search at one time if you’re subscribed to the Pro Subscription Plan; or up to three searches simultaneously otherwise.

Search History
The Search History tracks searches and search results. You can also look at search results using the View Results tool.
- Scroll up to the top of the Basic tools page and locate the green button.
- Click SEARCH HISTORY. A new will page display.
What's Next?
To track your scan progress, visit the Search History page article.
Explore the View Results tool by checking out the View Results article.


